티스토리 뷰
G - reetings, G - market !
This is Minwoo Kim, a developer in Seller & SD Engineering team of Gmarket.
After receiving a proposal from my colleague to write an article for our company's official tech blog, with great honor, I determined to pioneer the inclusion of English articles on this platform, showcasing a sophisticated level of expertise and craftsmanship.

With the intention to attract international audiences to our site (as a matter of fact, the company name used to be "Gmarket Global" and "eBay Korea"), the purpose of this article is to discuss a broad and well-known topic : Jetbrains, which is one of our company's favorable dev tools including Intellij, Webstorm, Rider... and so forth. (Since Gmarket subscribes to the licensing of JetBrains software, this article disregards the absence of such plugins or settings in Community editions, thus focusing solely on the available features and resources for paid services in Jetbrains.) This article will mainly focus on examples from IntelliJ, while acknowledging that there are many similar and different features in other Jetbrains products.
Furthermore, this article includes "Cool Tips" which is phonetically similar to "꿀팁 (k’ul-tip)" in Korean. This compound word combines '꿀 (k’ul)' translated as 'honey' with 'tip', resulting in the overall meaning of "tips that are handy and delightful like honey, but also not well known." It is worth noting that cool tips can also be interpreted as "cool tips" literally.
Cool Tip #1 : Handy hotkeys
These are the lists for shortcuts that the author personally favors but not well known. Other well known hotkeys are mostly described in other blogs like this blog or the official Jetbrains hotkey document.
1. Jump into Impl codes

Whenever we need to traverse inside a code, all we need to do is press command and click the code together. Well, in reality, many coders will get frustrated when this navigates to an interface or abstract class that has no logic but the code structures.
To resolve this issue and jump into the class that implements it, all we need to do is add the options key. So press command and option and click the code.

Meanwhile, if the user intends to go back, they can easily press the side button of a mouse, precisely the button called "button 4".

No mouse with the side button or so-called "button 4"? Press Command and [ .
Not that intuitive? Then change the hotkey by going into Preferences > Keymap and find the command, in this case "go back". And right-click and press Add keyboard shortcut. Add a key combination that you prefer!

In my case, I added Command + Backspace and removed that key combinations for the former command
2. Place Multicursors
This feature is quite cool, yet not widely known. This allows us to place more than one cursor and type the same inputs for those spaces. We do not need to write repetitions as a punishment during detention, like Bart Simpson.

The commands are to press Command, Shift, and Option simultaneously and then click, click, click multiple times anywhere to place each cursor. Then type or backspace whatever those cursors need to do.

Congrats! You evolved to a Machamp programmer!

3. Indent Backwards
The well known method to indent, as a norm, is pressing the tab. Also several know that we can indent multiple lines by click and drag then press the tab. However, some are unfamilar with indenting backwards, as known as 'outdent'. The method is simply pressing shift and tab. Vice versa applies for multiple lines. The click-and-drag method for indenting multiple lines applies vice versa for outdenting.
4. Search Everywhere
This feature is more intuitive to VS code users because the feature itself stands alone as a menu on the top left.

Those who migrated from VS Code may initially experience stress due to the absence of the magnifying glass button. Nonetheless, they seem to handle command + f instinctively to find a code. Unfortunately, this command finds the parameter input only on the current page.
Just add shift here! Resulting in Command + Shift + f . Then this modal appears to help you find the code in your project. If it is necessary to find every code including external library files then change the tab to Scope. Matching lower/higher cases, Exact word, or Regex options are available just like VS Code.

If the programmer knows Command + f is the universal shortcut for finding, he shall also assume command + r is the replace hotkey. Eventually he or she will acknowledge the fact that Command + Shift + r also means to find and replace in all codes.
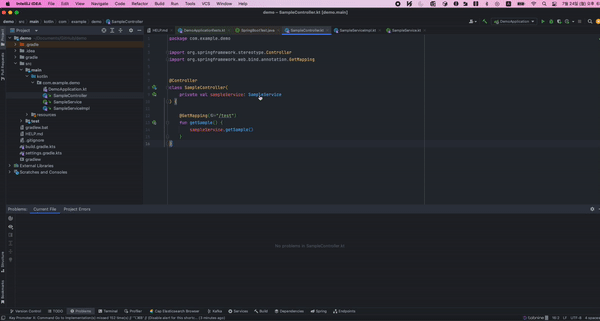
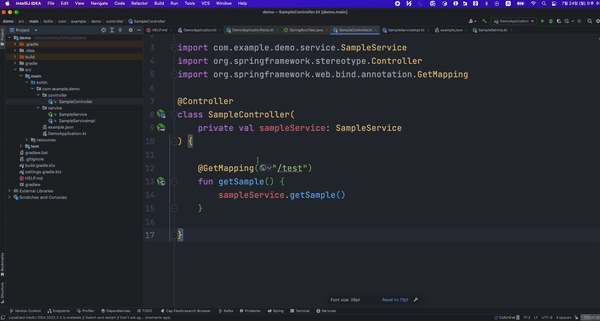
Meanwhile, Jetbrains provides a smarter replacer, as known as, Rename.
right-click the target code > Refactor > Rename or Shift + F6

The reason I consider this approach smarter is that it not only changes all instances of the same code but also recommends renaming variables or inherited class names
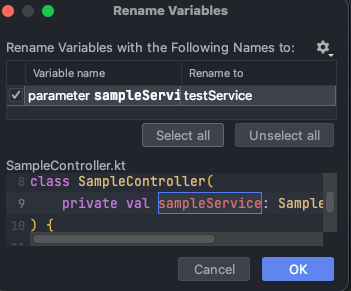
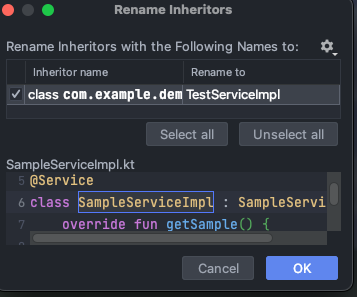
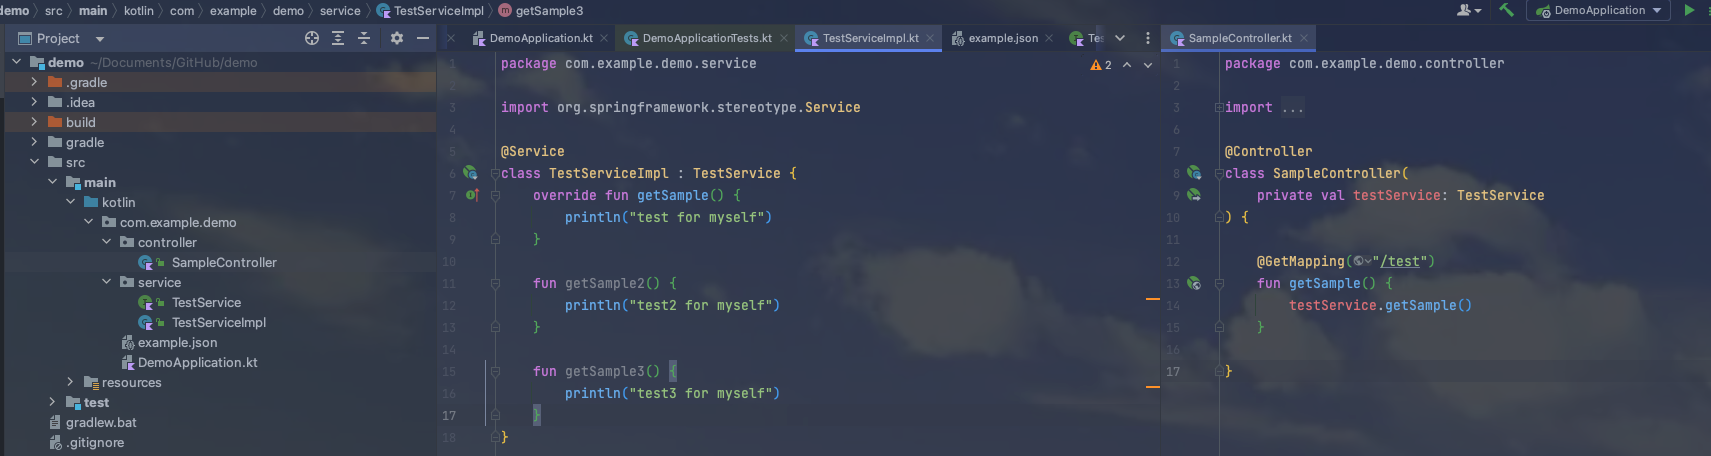
In my example code above, thanks to "Rename", the service name changed but also the Impl class and the variable name injected in the Controller.
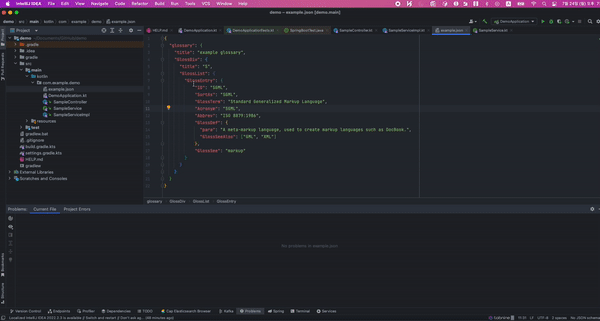
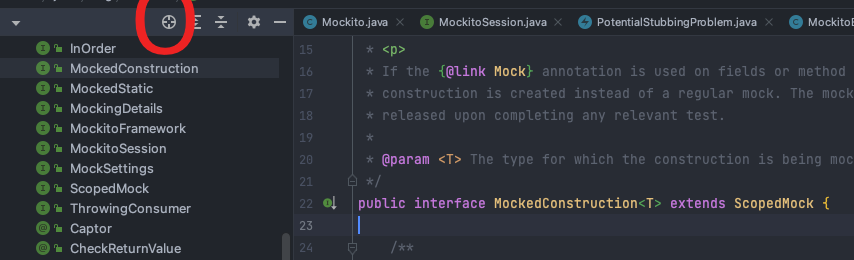
Another hack is : search not only the code, but also every command or config. Probably the most significant hotkey ever needed. This shortcut is easier. Double tap the Shift key. Thus, press shift and press shift again.

As presented above, not only can I search the specific code, I can also find the command "Split Right" to split the view and replace the current code to the right while the left side renders another code. (By the way, the hotkey for split right is to click the target file on the left project tab, then press shift + enter)
Cool Tip #2 : Life hacking settings
This article will highlight some great settings that can improve coding efficiency, which should have been the default options.
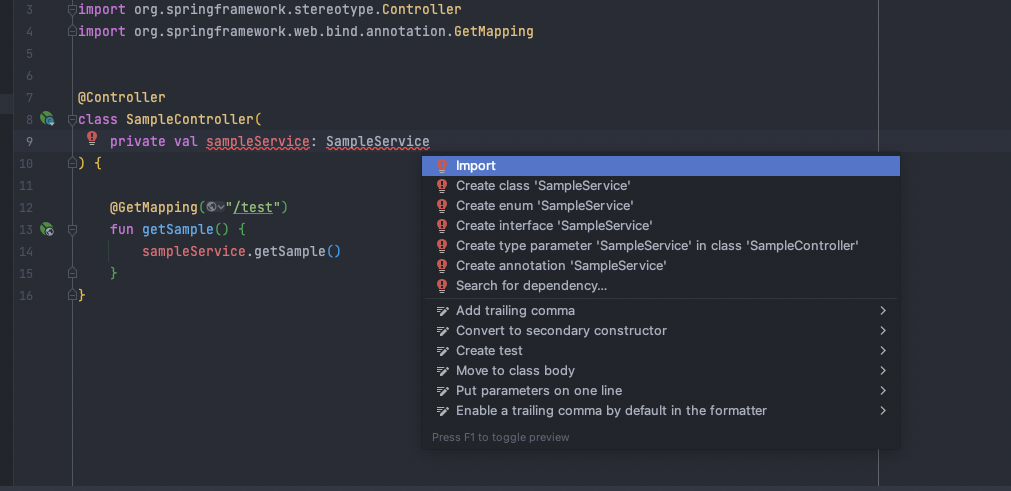
1. Auto import / Auto clean unused imports
Novice JetBrains users often get confused when they have to manually import codes, even though only one candidate for that class to import throughout the entire code. The well-known method should be to "right-click on the import error code" or "click, press 'option' and 'enter' and then press 'import.' "
Nor do they not understand why to manually remove all the unused imports.

Mostly, this is resolved by using command + option + L, which actually means to reformat the code. The main idea here is to find an automated method—one that carries out this task effortlessly, with the added significance of automatic triggering when necessary.
So to resolve this go to Preferences > Editor > General > Auto Import and enable the below checkboxes.

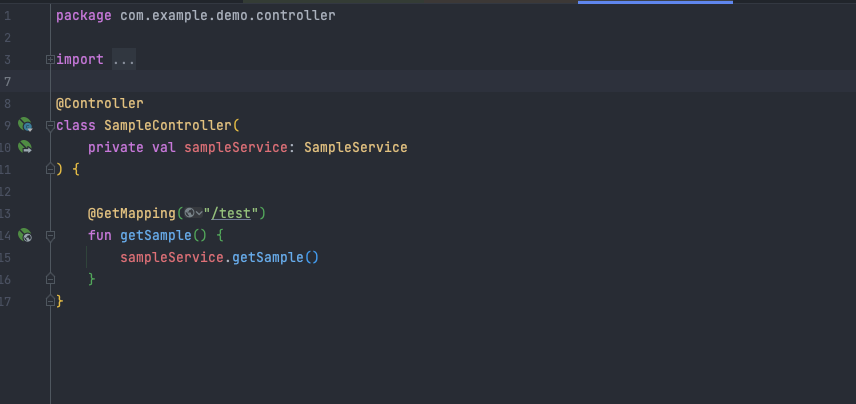
Now we eliminate the inconvenience to manage necessary and unnecessary imports and let the IDE do the job.

Although this feature seems flawless, yet we need to pick the right imports manually if there are more than two possibilities. For instance StringUtils is a classname widely used in numerous libraries. So obviously the IDE cannot 'auto' import.

Another issue arises when we consider the scenario where the dependencies loaded do not include Apache Tomcat. In such circumstances, the code will automatically import the Spring Framework's StringUtils. However, even if the functions have the same name, their underlying logics may differ, leading to potential critical errors. Furthermore, even when the code is temporarily commented for future use, the unused imports will be still eliminated.

Nevertheless, if the benefits outweigh the drawbacks, feel free to use this setting with pleasure.
2. Invalidate Caches
Many programmers encounter a recurring error when building projects. Despite a seemingly flawless setup, an unknown error persists during each build. As a result, approximately 90% of them resort to locating and selecting the 'Rebuild Project' option to address the issue.

Try this menu : "Invalidate Caches". This may resolve your problem.

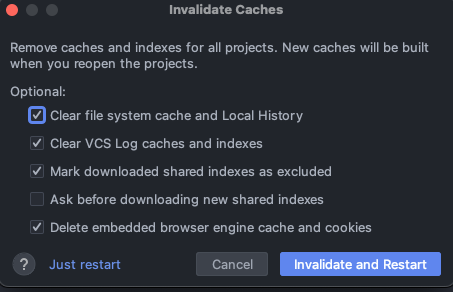
Despite the additional time required for reindexing and building the code, this process somehow fixes the code by addressing not only the project code itself but also the internal codes of the IDE. The "Invalidate Caches" process clears and refreshes cached data, resolving problems related to both the project and the IDE's internal workings. As a result, this method contributes to a more stable and reliable coding environment. Although it may not be the optimal solution, it's worth a shot, right?
By the way, if something is wrong with indexing or the project tab on your left side, probably the issue is mostly because of the SDK is empty or undefined. Check the menu File > Project Structure and if the SDK is empty or wrong like the below image, fill in the right SDK.

3. Manage Memory usage and performance
This menu can enable editing the max memory usage for our IDE. Of course, this also leads to faster testing even in our local environment. Go to Help > Change Memory Settings
(Warning : Check your RAM and, if it's not sufficient like a Macbook that uses 4GB, DO NOT USE THIS SETTING.)
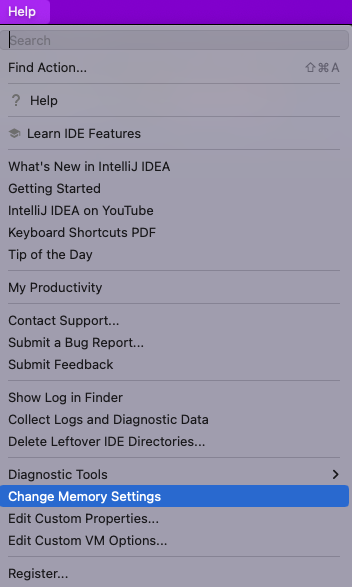

Now I'm comfortably managing 8GB instead of 2GB my IDE's running environment. Thankfully, this is fine because our company provided a Macbook with 16GB. As mentioned above, it is critical for a tiny memory based computers.
Now to monitor the usage of memory, right-click on the right-below corner of your IDE and click Memory Indicator. This button enables a simple concurrent view of how much memory is used for this IDE.


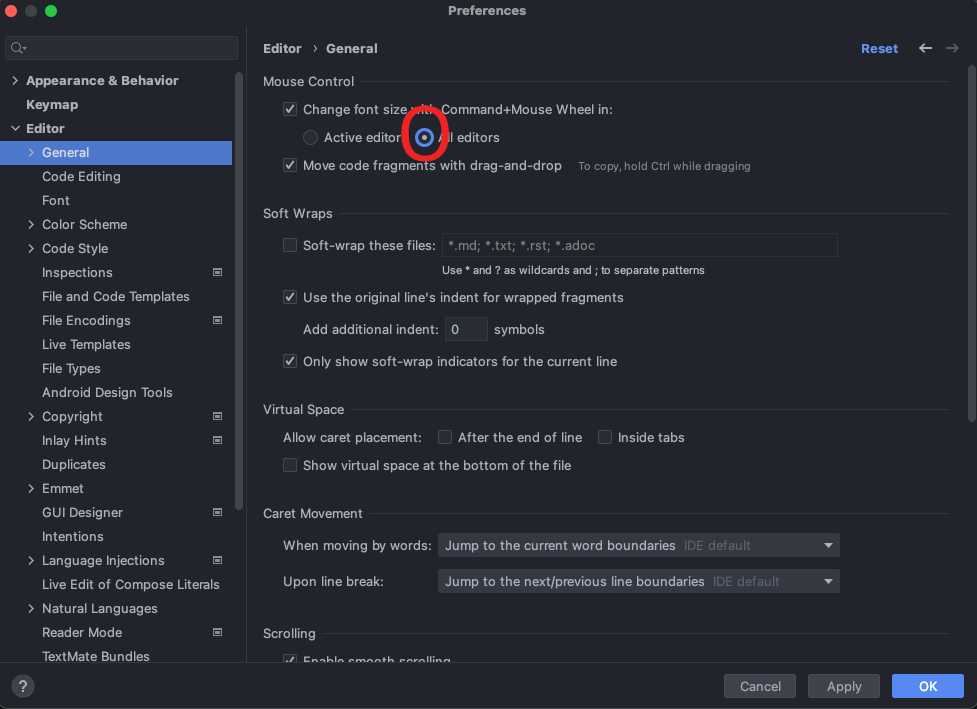
4. Zoom in and Zoom out, Globally.
One of the features that the author personally confused for a long time is the ability to zoom-in and zoom-out across all codes, not just the code currently opened. This is better illustrated with the images provided below for a clearer understanding.
Instinctively, programmers will notice pressing Command while mouse wheeling scrolling enlarges the code we are looking at. However, this function is restricted only to that code not all the other codes.

The traditional method to resolve this issue was to adjust the Size in Preferences > Editor > Font.
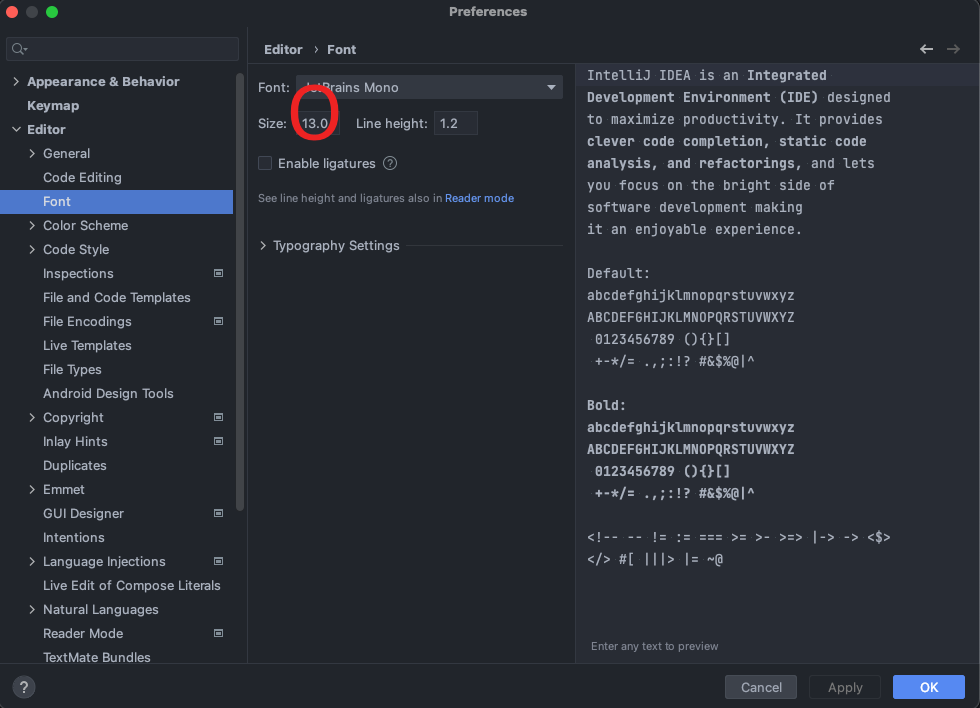
However, the problem is when I have a code review in a screen-sharing meeting with a colleague who has visual impairments. If they ask me to enlarge the code for better visibility, I must go to that menu, adjust the font size level, and then change it back to my preferred settings after the meeting ends, which can be a bit of a hassle.
A delightful solution, which should have been a default setting lies in this menu. Preferences > Editor > General and find Mouse Control and click on All editors radio.
5. Set Different Backgrounds for each Project
In essence, we can change backgrounds by projects. This depends on individual preferences. As further known, the IDE globally uses one particular "theme" for every project. Therefore, it is challenging to distinguish which project is which when both projects are open at the same time.
For each project, Go to Preferences > Appearance & Behavior > Appearance and click the Background Image button.

Then add an image and click the checkbox. "This project only" . (repeat for each projects)

The above image conveys all the information clearly. Despite both projects being under the same IDE and theme, the background sets them apart, enabling us to swiftly identify and discern one code from the other at a glance.
6. Highlight and Follow the Current File in the Project Structure Tab
Paradoxically, navigating both the code and the project structure on the left side of the view in a large-scale project is not as straightforward as one might expect. As shown in the lower GIF image, the user can easily jump into a code by using "Command and click" ; however, finding the code's location requires individual effort.

enable this setting here, Press the gear button(⚙️) > Always Select Opened File.

Now, the project structure tab on the left side follows the code the coder opens.

However, for those who prefer to avoid unintentionally encountering a jumble of read-only files in sizeable, widely-known libraries, particularly when dealing with basic files like the example provided, an alternative approach is needed.

Press this button instead. By doing so, the project structure will follow and highlight the current code only triggered by the button event, rather than automatically highlighting the current code all the time.
7. Share settings
Exhausted reading this article? There must be at least one colleague that read and followed these instructions, right? (...right..?) Well, for those who are lazy to even try, here is your solution. Ask the colleague to press the File > Manage IDE Settings > Export Settings to make a 'settings.zip' file. Then, transfer that 'settings.zip' file to your computer somehow.

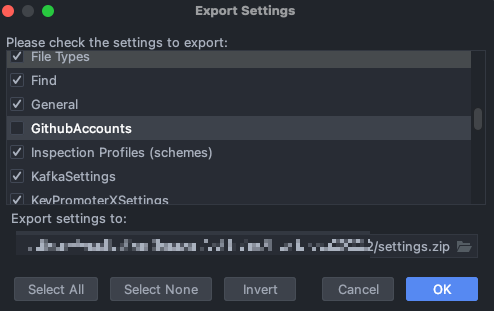
As many of you have expected, now press Import Settings and put the settings to your IDE with a click. And if you have at least a bit of conscience, buy a coffee for your colleague.
?. Theme Plugins
The reason why this is numbered as '?' is that it could have been the context for my next topic: Jetbrains Cool Tips: Part 2) Jetbrains plugins vs 3rd party plugins. I also thought it would be nice to leave a hint in the introductory article, suggesting the possibility of further exploration in a recursive style. However, I also intended to describe the reason why many starters that just confronted IntelliJ has the view like this:
while mine looks like this :

Go to Preferences > Plugins press the Marketplace tab and search "Theme". Install a theme that you prefer.

Go to Preferences > Plugins press the Marketplace tab and search "Icons". Install an icon theme that you prefer.

Although this just may be a juvenile reason, Jetbrains's open market for charming dark themes attracted many other users like Eclipse or STS users, leading to its massive growth in population. To be honest, these captivating themes create a genuine affection for my code, leading eventually to increase code productivity.
This can enhance your code's productivity too, which is why this article strongly recommends this setting (a.k.a plugin).
Concluding the Narrative...
I hope these cool tips will enhance your coding experience with JetBrains tools. Embracing these lesser-known features can significantly boost your productivity and efficiency while coding. Don't hesitate to try out different hotkeys or settings to further personalize your IDE and create a coding environment that suits your preferences best. Stay tuned for more content on our Gmarket's tech blog! If I have the opportunity, I will definitely continue with Part 2 about plugins and share more valuable tips and tricks with you :)
G - ive Regards, G - market !